So, you’ve just had your home painted, and you’re absolutely loving the way it looks! Finally the hassle of renovating is over! However, if you’d really like to get the most bang for your buck, there is a small amount of effort that goes into maintaining your painted walls and ensuring it’s longevity.
Cleaning your Painted Walls
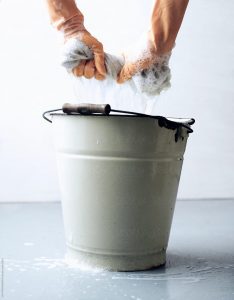
The key to cleaning any painted surface is being gentle. If you rub too hard, use an abrasive material or harsh chemicals you can rub off some of the paint’s original finish. This leaves you with spots on your wall that look to be a different color and texture than the rest of the area. So, when cleaning your painted walls it is important to keep the following tips in mind.
Stains
The longer you leave a stain, the harder it will be to remove. Since painted walls need a gentle treatment, this means that you might not be able to remove the stain without damaging the paint if you wait too long. The best way to protect your paint project from damage is to clean a stain as soon as it happens, or as soon as you notice it.
Use a soft rag, non-abrasive sponge, or paper towel with some warm water and rub the stain gently. For more persistent spots such as grease or other oil stains, mix the water with some mild dish soap. After completely removing the stain, rinse the wall with plain water one final time to remove any soap residue.
Realistically, stubborn stains will be happen and you might have to use a more abrasive cleaner or sponge. If you need to touch-up the paint after cleaning the area, be sure to use a stain blocking primer to ensure full coverage.
Scratches/Scuffs
Fixing a scratch is a more involved process, therefor it is much easier to take preventative measures to avoid the situation all together. For example, we recommend using felt or clear rubber protectors for chairs and other wood furniture. In addition, we advise against painting frequently walked on surfaces such as staircase steps or any type of flooring. It is virtually impossible to keep these surfaces scuff free, and would most likely end up needing frequent touch ups.
Touch-ups
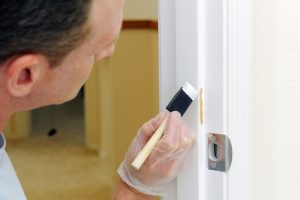
Though avoiding touch ups on painted walls is ideal, there are some ways to make the process easier and provide you with a “good as new” end result. Using the right paint, materials, and technique is essential in successfully touching up any surface
The Paint
Ideally, you should have a bit of leftover paint from your project. Check out our article on Paint Storage to get essential information and helpful tips on storing paint. If the paint has been stored correctly and is not too old, this will help greatly in matching the existing color.
However, if you do not have leftover paint or it hasn’t been stored correctly, you’ll need to get a new can of the exact same color and sheen. If you know the name of the color and sheen that was originally used, simply let a store associate know and they will be able to help you. If you do not, chip off a tiny sample of paint from the area you need to touch up. The store will be able to match the exact color from this sample.
The Material and Technique
If possible, try to use the same applicator that was originally used. This will give the touched-up area the same coverage and over all look as the original paint. If not, this will not ruin your touch-up. You will just have to be more precise in the technique you are using.
You might be tempted to paint a large swatch on the wall, but this will actually create a more noticeable spot. Try just covering the necessary area and feathering it out into the surrounding paint. This will give a more even finish, and prevent a noticeable line between the original and new paint.
Generally, painted walls do not require a significant amount of maintenance, but taking the time to do these few extra steps will keep your walls looking brand new for much longer, saving you the money and stress of having to entirely repaint.
Ready to paint? Schedule your free in-person or virtual estimate with ONiT Painting today!