The Importance of Exterior Painting Set Up and Prep
When you think of painting your Indianapolis home, what is the first thing that comes to mind? For most it may be color selection or paint finish (which are both very important!), and not the set up and preparation before the paint goes on the surface. So, what exactly goes into exterior painting paint prep? Paint prep is the process of preparing your home before you even take a paint brush to it. Paint prep is all about creating a clean, fresh canvas so that your paint products will properly adhere to the surface of your home. There are different paint prep steps you’d want to take for different projects and surfaces however, we’re going to take a look at the best paint prep practices for painting a standard Indianapolis home.
When it comes to painting your home’s exterior here in Indiana (Hello crazy weather!), there are a few things we are hyper aware of. That means we will do a thorough inspection of the home at the time of your estimate and also right before the paint prep process begins. Things that we keep an eye out for include but are not limited to; rotten siding or trim, loose nails, bare wood, flaking, bubbling, or peeling paint, as well as dirt and debris.
We mentioned earlier that exterior painting prep is all about creating a clean canvas so products can perform at their best. Paint prep may seem a bit tedious but it’s critical to getting the finished product you’re looking for. Take a look below to learn more about our prep process:
1. Replace rotten boards
ONiT Painting services include light carpentry, which means we will make sure that any rotten boards are taken care of before we paint.
2. Securing loose boards
Our painters will ensure that all boards are secured to your home and nails are securely in place. This paint prep step helps to create a strong barrier to keep moisture out.
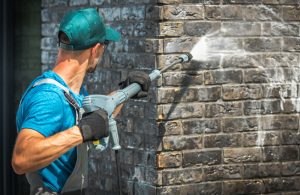
3. Pressure washing
Is pressure washing your home before painting really that important? YES! Now, when we talk about a pressure wash you should be looking at a light rinse. There is a time and place for a high-pressure wash, and this is not it. Pressure washing your home before painting will ensure you’ve removed any dirt, debris, and cobwebs so that the paint will have a clean surface to adhere to!
4. Scrape loose and peeling paint
To create a smooth, even surface we will scrape any loose or peeling paint as part of the prep process. A common misconception is that if the paint is thick enough or enough coats are added, it will cover any problem areas like this. Paint does a great job of sealing things up, but it will show whatever texture is beneath it. That means if you leave bubbled or flaking paint on the home before painting, you will more than likely still see that later. (Side note: Did you know that ONiT Painting is lead safe certified? If your home was built before 1978, give us a call!)
5. Caulk seams and nail holes
Caulking the exterior of your home helps to seal everything up so the outside elements can’t cause damage to your home.
6. Prime bare boards
If you have brand new boards or older boards that just need a little TLC you’ll want to prime them. We also highly recommend priming areas where snow typically sits; the bottom of the home and areas by the roof line. It’s a simple step but really helps your paint stick.
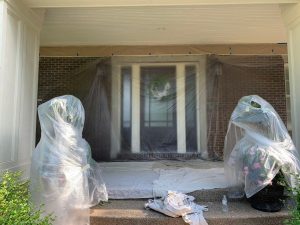
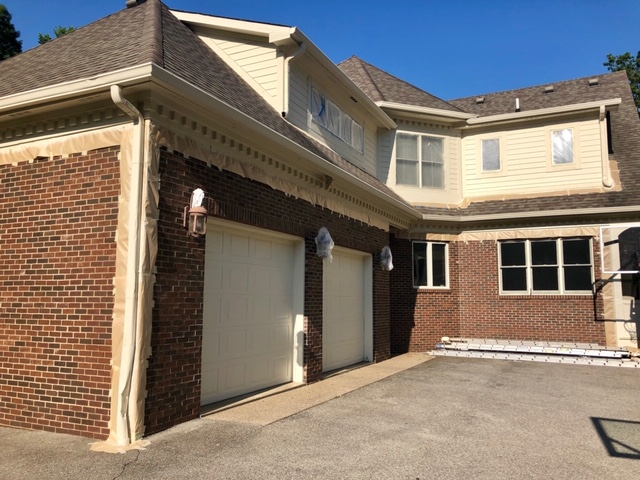
7. Cover and protect your home
A large part of the exterior painting prep process has nothing to do with the paint adhering. It’s all about protecting the workspace from any paint spills or over-spray. If we are completing a spray application, then we are extra careful to put plastic down and tape off windows. Over-spray is a very common mistake, so we spend the extra time protecting everything to ensure that it doesn’t happen. Some areas to be hyper aware of are the roof, the driveway and walkways, bushes, windows, brick or stone, and fixtures on the home.