Suzanne had been living in her Pittsboro, IN home for quite some time. The home was built in 1991 and the kitchen hadn’t been updated since. Suzanne was looking for a brighter, more modern kitchen than the one she’d had for so long. Because of this, she called ONiT Painting to get a free estimate for kitchen cabinet painting.
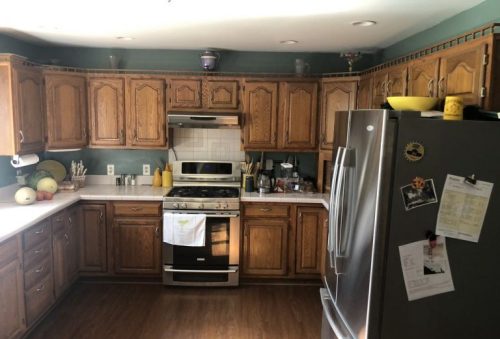
Before ONiT Painting
Our Sales Representative, David Amatuzzo, conducted Suzanne’s estimate back in the fall of 2020. However, she did not choose to move forward with the project until this past January. We see this quite often at ONiT Painting, and it is truly no problem for us. Often customers will get a quote very far in advance so they have time to budget and save up for the project, or life will just get in the way and they’ll have to postpone having the project completed.
Either way, we are always here to help our customers whenever they’re ready! If there is a situation where it has been a long time since your original quote, we will have one of our sales representatives look over it, or sometimes go out and conduct a new estimate. From there, we can proceed with the scheduling process as usual!
Suzanne chose to take her cabinets from a deep walnut color to a very trendy two-toned white and gray color scheme, with white on the top set and gray on the bottom. For the gray color, she chose SW 7006 Gray Matters. This is a light gray with a slight green undertone. It’s extremely popular for Cabinet Painting, and provided just enough contrast from the white to be extremely visually interesting, without being too harsh.
Melvin Portillo, our Project Manager, was in charge of over seeing Suzanne’s project. He conducted his initial walk-through, made sure that the scope of work and color selections were correct, and from there we completed our tried and true Cabinet Painting process.
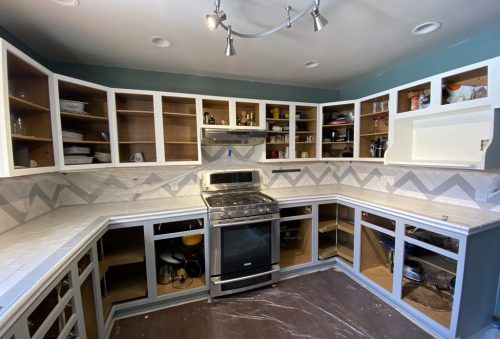
In Progress with ONiT Painting
ONiT’s Kitchen Cabinet Painting Process
- Set up and Protect We cover and protect flooring, counter tops and appliances before we begin.
- Clean We clean your cabinets with a de-greaser or denatured alcohol to remove dirt and oils.
- Remove Cabinet Doors and Faces of Drawers We will remove doors and drawer faces. Based on the project and customer preference, we will take them to a designated area of your home or off-site. They are labeled and numbered for easy re-installation.
- Scuff and Sand We lightly sand and scuff your cabinets to abrade the surface. This creates tiny hills and valleys in the lacquer to make a sound surface for the prime coat to adhere to.
- Vac and Tact We use a combination of a shop vac and microfiber cloth or tact cloth to remove dust and micro particles, leaving a clean and dull surface for prime coat.
- Prime Coat We apply 1 full prime coat of a quality primer that will bond tightly to the cabinet surface.
- Finish Coat We apply 2 finish coats of a satin or semi-gloss urethane based paint, leaving a beautiful and uniform finish.
- Reinstall Doors and Drawers Once finish coat has dried, we reinstall doors and faces of drawers with previous hardware or new hardware that fits existing holes provided by the customer.
- Clean Up & Inspection
We complete a final clean up and quality inspection of finished product.
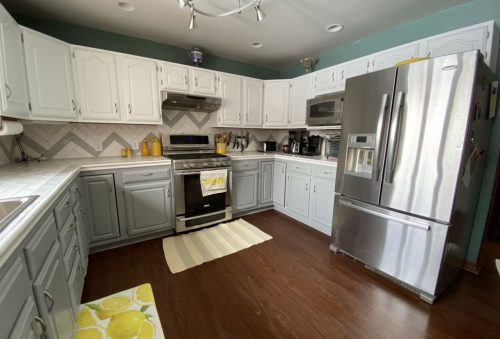
After ONiT Painting
The cabinets turned out beautiful! Melvin completed his final inspection where he checked to make sure everything was cleaned-up and completed to our quality standards. The two-toned look transformed the kitchen into a modern oasis. It’s almost hard to believe that the only difference is cabinet painting! Suzanne is extremely happy with the new look of her kitchen, and so are we!

